Wednesday, October 29, 2014

Predator Proofing

This weekend I worked on predator proofing my chicken coop foundation. This may not seem like a  big deal but it turns out anything will eat a chicken. Rats, dogs, raccoon, hawks etc. Not only do you have to make sure that every crack is sealed but you need to make sure that nothing can dig under ground and make tunnels into the outside part of the chicken coop. If an animal dug a tunnel and then came up through the bottom of the coop they could very easily eat a couple chickens for dinner and then scurry off. I decided, in an effort to prevent this from happening, that I would make a predator proof foundation. First I dug a hole the same size as the chicken coop that was 12 inches deep. I then leveled the bottoms and sides and laid rat wire on the bottom. I then laid cinder blocks around the edges and filled in back up with dirt. This involved a lot of physical labor and took over 8 hours to complete. But, by designing it this way it will hopefully make sure that no predator can find its way in to feast on cute little chicken morsels.
Leveling the foundation


The foundation before we put the dirt back in 

We dug up 40 square feet of dirt!

I had a little problem when filling the foundation back up with dirt! 

Next weekend (November 9th) I will be visiting Faith Farms and this Saturday I will be visiting the farmers marker. Stay tuned for posts about those and more pictures and updates about my own urban farm. 


Wednesday, October 22, 2014

Wings with Feathers

This morning when I walked downstairs to check on my chickens I opened the lid and  one chicken flew all the way up to the top of the box and then fell right back down into the food bowl, rolled over and got up again. I picked the chicken up and looked at its wings. Above the fluffy fuzz there were  real feathers on her wing.  Not only are they getting real feathers but in only a week they are double the size they were when they arrive, the colors of their fuzz/feathers has begun to darken and they are much stronger. Here is a picture of them now:


Stay tuned for more pictures, updates and blogs!


Sunday, October 19, 2014

Pasty Butt and Peachy Orange

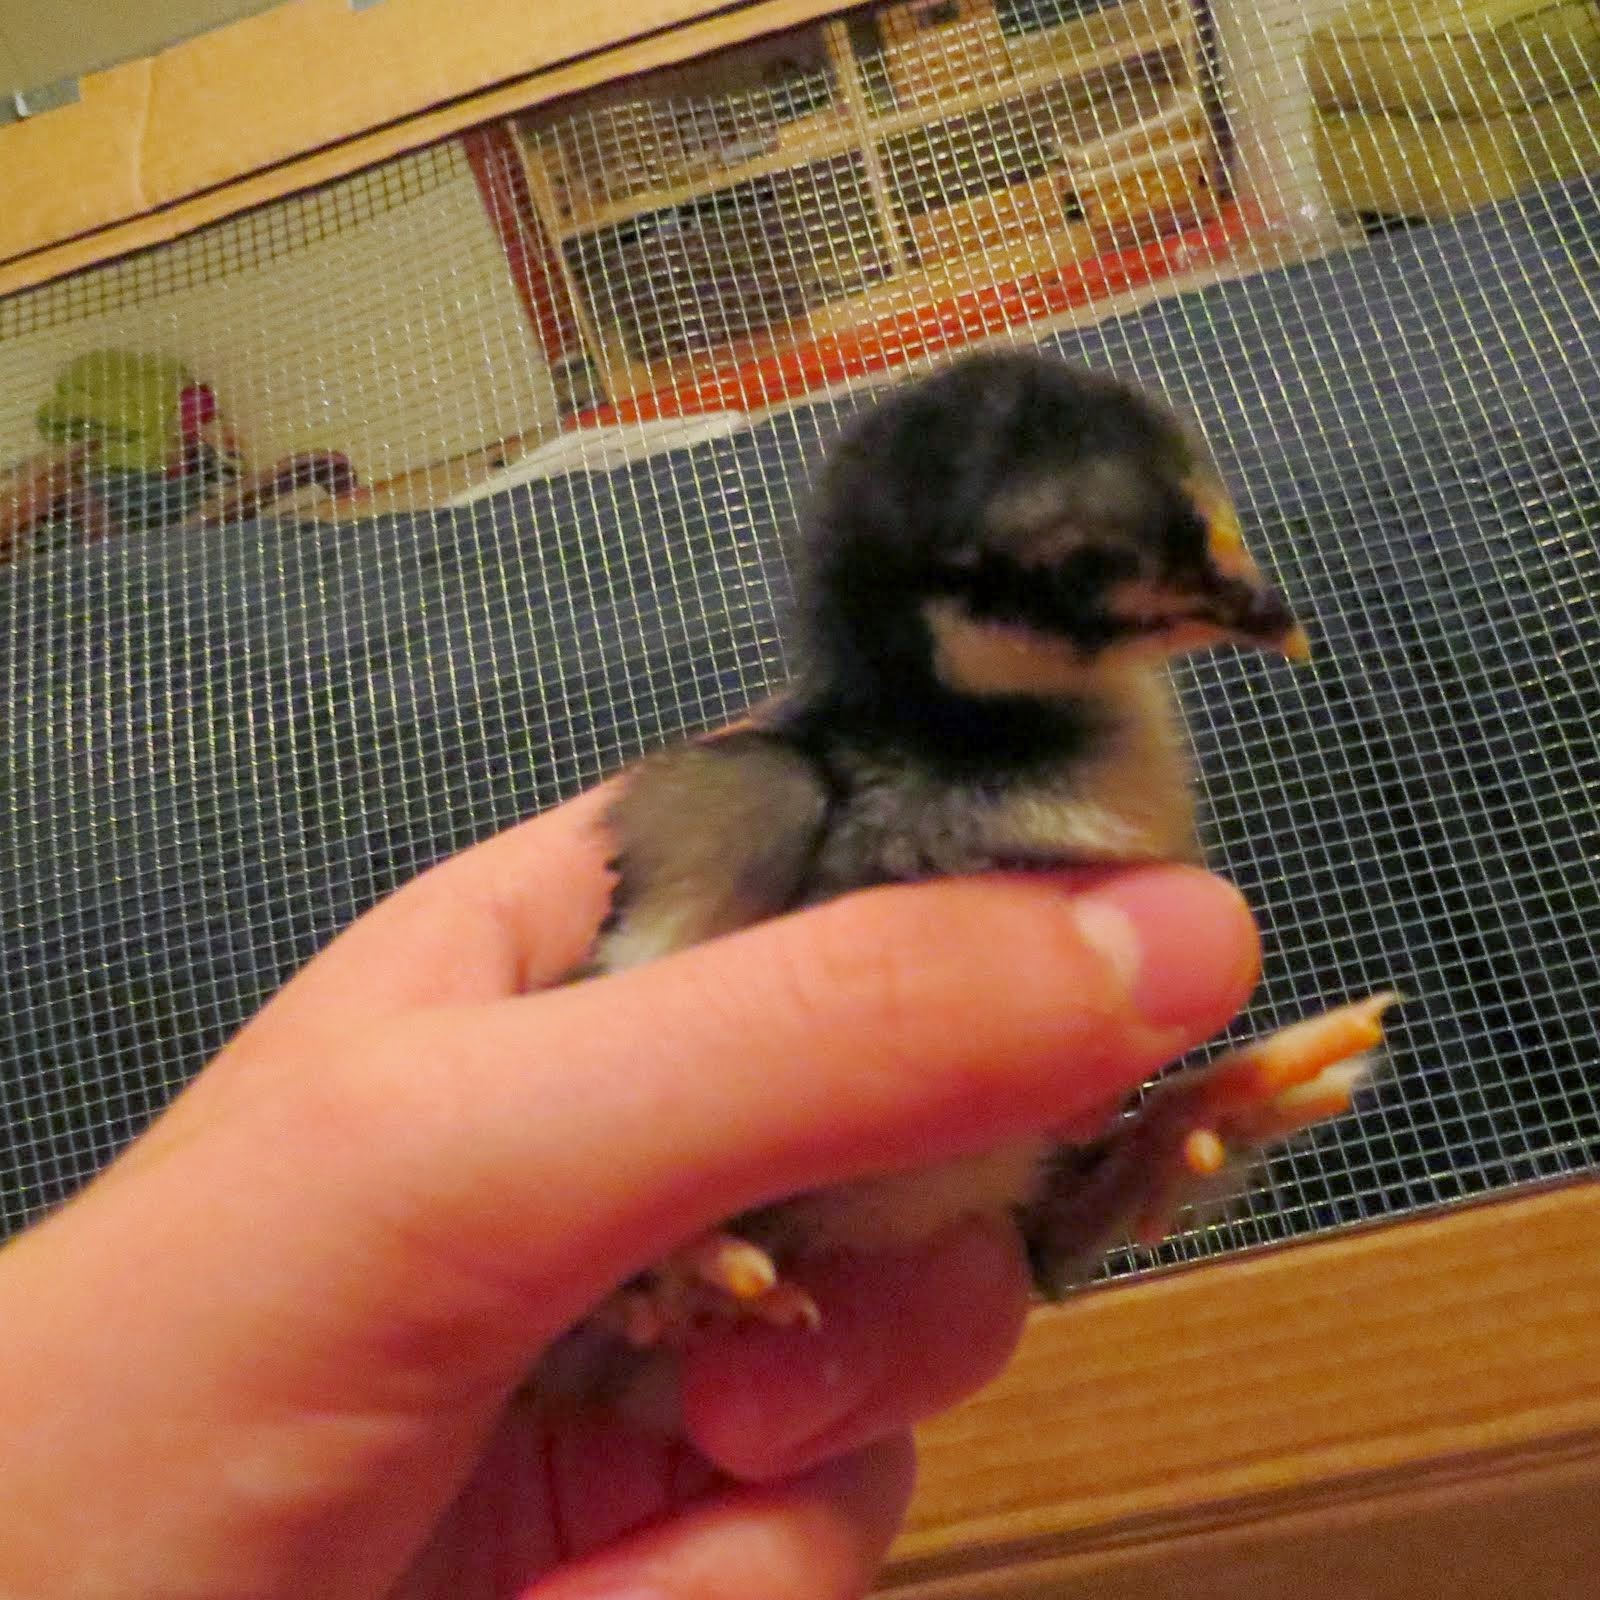
This weekend I spent a LOT of time with my chickens. Stopping them from flying out the brooder, keeping them entertained, re filling their yogurt bowl and cleaning their vents. This was the nastiest part. When chickens are young they often get this thing called "pasty butt" which is where their droppings clog their intestines. This causes them to become lethargic and not want to eat or drink. This is where I come in. When this happens you have to pick up the chicken, run them under warm running water and clean their vents with paper towels and Q-Tips, gross right? Well, gross or not it is crucial, if not taken care of it can be fatal. Well, this weekend two of my chickens got pasty butt, because of this I spent some of my weekend running my chicken's butts under warm water and believe me, they really don't like it!

Knowing this could be fatal I really wanted to help my chickens and prevent them from getting pasty butt. I researched the best solution and almost every website I read said adding some yogurt or smashed hard boiled eggs to their diet will really help. So, I added a bowl of plain full fat yogurt. At first all they did was walk through it and spill it all over the wood chips (this took some cleaning as you can imagine). Finally one if the chickens discovered the yogurt. She decided to lay down in front of it and eat. She must have eaten a whole 3/4 teaspoon of yogurt (that is a lot when you are only 4 days old!).

The rest of the weekend I spent finishing the frame for the chicken coop and choosing the color. This was not an easy task. At first I wanted orange, then I wanted green. I then considered purple and blue. Then I thought about gray and green. Once we had gone through about every color on the sample wall we took the samples up the paint counter. I was still deciding when we got there. Coincidentally the man working at the paint counter also raised chickens. After a lot of back and forth he convinced me that orange was they way to go. The color is below:

Orange

Sample wall - what a lot of choices!
In total we spent about 3 1/2 hours over the course of the day at Home Depot. We looked at siding, roofing, rat wire and hinges. It all seemed SO expensive. I have raised all the money for this coop babysitting and I am really counting every penny.  As we were driving home I was looking at buildings and thinking that if it costs this much to build a chicken coop I can not imagine how much money one of those would cost!

When we got home and started painting I discovered the orange was a big mistake, it looked really bad!  It was an ugly peachy color and was a huge eyesore. It looked almost like a big cube of cheddar cheese in the middle of our backyard. We are reconsidering and thinking we may paint it the same earthy green as our shed. Overall we had a very busy weekend! Right now my chickens are peeping happily in the brooder box in the basement and eating yogurt. Here are some pictures:


Stay tuned for more pictures and updates! 


Wednesday, October 15, 2014

Today was the big day! The chickens arrived. It was a very comical arrival. The post office called mid morning and told us, as if it happened every day, that our chickens had arrived and were waiting in the back room. Once we got to the post office we asked about picking up the chickens. The person working went in to the back room and brought us a very very small box! The box had holes in the top and warning stickers and signs pasted all over it. They handed the box over slowly and I could hear the peeps coming from inside the box. We must have looked very funny walking out of the Post Office with a cheeping box covered in warning signs because we got our fair share of funny looks.

As of now all the chickens appear to be healthy. When we opened the box they were cheeping and lively. There is one little one who is getting picked on by the bigger ones but I hope she will start to fight back soon. Below are some pictures of the chickens in the box they came in:


 Once we got them home we had to carefully transfer them in to the prepared brooder box.  I had a big box that I filled with pine wood chips. There is a picture below:


I had also prepared a feeder and a water machine filled with fresh water and medicated chick feed. The chicks really do have bird brains and it took me sticking their beaks in the water and shoving their faces in the food from them to realize they had access to food and water. When they found out they begin to run around in a feeding  frenzy. They have everything they need in their box: heat, food, water, wood chips, treats and essential oil to calm them. Everything is working out so far! In 2 weeks I am visiting Faith Farms, a local and sustainable dairy farm. I will have a blog about that soon. Stay posted!

Tuesday, October 14, 2014

My Own Urban Farm

Richmond and the area surrounding it is the home to many Urban farms that support and educate the people living in these communities. I have looked at and reviewed quite a  few farms (see earlier posts) and I have been inspired by each and every one of them. Them something came to me - if all these other farmers and able to grow and produce food locally, support the community and environment , why can't I?

Obviously because I go to school everyday and do homework every night I can not independently run a local farm that produces like Origins or Tricycle Gardens but maybe I could do something on a smaller scale, like chickens!

So I have decided that with no expertise, a small backyard in Henrico County, a dog, a cat, two siblings, and a computer that I am going to raise chickens. The first thing I needed to do was research, I contacted a few people I know who were already raising chickens and learned there was a lot more to it than I thought.

For the first 5-8 weeks chickens need to stay in a brooder box and be kept warm. When they first arrive the box should be 95 degrees and then each week you decrease the temperature by 5 degrees until it reaches outside temperature. Considering that it is the middle of October this make take longer then expected. Chickens also need special feed and attention for the first weeks.

But, because chicken ordering season is almost over I had to get on it fast so the first step was to order chickens. I am getting a total of 6 hens (and hopefully no rosters, there is a 6% chance). A couple of the breeds I got are referred to as lap chickens (they are very social)! Below are the pictures of the chickens I am getting:

Black Frizzle Cochin Bantam 

Welsummer Bantam 

White Crested Blue Polish 

Golden Buff


My friends dad owns a construction company and very kindly donated wood to build my chicken coop. I created plans based on pictures and designs of other coops I had seen. Each chicken needs an average of 2 to 4 square feet inside the coop and then the same amount of outside space. This may seem like as easy requirement to meet but the big deal is making it predator proof. EVERYTHING eats chickens. Snakes, birds, hawks, raccoons, rats, dogs, cats and may other animals. This means that every little hole needs to be sealed. This weekend I worked on building the coop. The first step (because the wood was untreated) was to prime all the wood. This would help it withstand outside weather. The second step was to assemble the frame. I only got this far in this process but the next step will be to attach siding, make the roof, make the nesting boxes and paint the coop. 


But in the meantime I had some research to do. My chickens will be arriving soon and it would be nice if I knew something about chicken care. I found a wonderful research website called mypetchicken.com which gave me all the basics about what they eat, how they behave and how to keep then happy but I really needed someone with firsthand experience. I contacted two family friends who already raised chickens and they both were very kind and informative. 

My chickens are arriving on October 15th and they will be 2 days old. I will keep you posted on how things are going with my own little Urban farm!